介绍
Mattermost是一款开源通信服务,目前有团队版和企业版,其中企业版要收费,功能更全面一些,但是我们个人或者团队的话,使用团队版就可以了
话不多说,下面就开始部署
搭建
由于我们使用Docker来进行部署,需要确保服务器已经安装Docker,同时官方文档也提供了使用Docker部署的步骤,可以直接去参考官方文档
容器化服务创建
首先创建一个放置配置文件的目录,例如我的是/docker/mattermost/,进入目录,创建docker-compose.yml文件并写入下面内容,不需要修改直接保存
services:
  postgres:
    image: postgres:${POSTGRES_IMAGE_TAG}
    restart: ${RESTART_POLICY}
    security_opt:
      - no-new-privileges:true
    pids_limit: 100
    read_only: true
    tmpfs:
      - /tmp
      - /var/run/postgresql
    volumes:
      - ${POSTGRES_DATA_PATH}:/var/lib/postgresql/data
    environment:
      # timezone inside container
      - TZ=${TZ}
      # necessary Postgres options/variables
      - POSTGRES_USER=${POSTGRES_USER}
      - POSTGRES_PASSWORD=${POSTGRES_PASSWORD}
      - POSTGRES_DB=${POSTGRES_DB}

  mattermost:
    depends_on:
      - postgres
    image: mattermost/${MATTERMOST_IMAGE}:${MATTERMOST_IMAGE_TAG}
    restart: ${RESTART_POLICY}
    security_opt:
      - no-new-privileges:true
    pids_limit: 200
    read_only: ${MATTERMOST_CONTAINER_READONLY}
    tmpfs:
      - /tmp
    ports:
      - 127.0.0.1:${APP_PORT}:8065
    volumes:
      - ${MATTERMOST_CONFIG_PATH}:/mattermost/config:rw
      - ${MATTERMOST_DATA_PATH}:/mattermost/data:rw
      - ${MATTERMOST_LOGS_PATH}:/mattermost/logs:rw
      - ${MATTERMOST_PLUGINS_PATH}:/mattermost/plugins:rw
      - ${MATTERMOST_CLIENT_PLUGINS_PATH}:/mattermost/client/plugins:rw
      - ${MATTERMOST_BLEVE_INDEXES_PATH}:/mattermost/bleve-indexes:rw
      # When you want to use SSO with GitLab, you have to add the cert pki chain of GitLab inside Alpine
      # to avoid Token request failed: certificate signed by unknown authority
      # (link: https://github.com/mattermost/mattermost-server/issues/13059 and https://github.com/mattermost/docker/issues/34)
      # - ${GITLAB_PKI_CHAIN_PATH}:/etc/ssl/certs/pki_chain.pem:ro
    environment:
      # timezone inside container
      - TZ=${TZ}

      # necessary Mattermost options/variables (see env.example)
      - MM_SQLSETTINGS_DRIVERNAME=${MM_SQLSETTINGS_DRIVERNAME}
      - MM_SQLSETTINGS_DATASOURCE=${MM_SQLSETTINGS_DATASOURCE}

      # necessary for bleve
      - MM_BLEVESETTINGS_INDEXDIR=${MM_BLEVESETTINGS_INDEXDIR}

      # additional settings
      - MM_SERVICESETTINGS_SITEURL=${MM_SERVICESETTINGS_SITEURL}

# If you use rolling image tags and feel lucky watchtower can automatically pull new images and
# instantiate containers from it. https://containrrr.dev/watchtower/
# Please keep in mind watchtower will have access on the docker socket. This can be a security risk.
#
#  watchtower:
#    container_name: watchtower
#    image: containrrr/watchtower:latest
#    restart: unless-stopped
#    volumes:
#      - /var/run/docker.sock:/var/run/docker.sock
然后创建.env文件用于配置环境变量,写入下面内容
# Domain of service
DOMAIN=mm.yourdomain.com

# Container settings
## Timezone inside the containers. The value needs to be in the form 'Europe/Berlin'.
## A list of these tz database names can be looked up at Wikipedia
## https://en.wikipedia.org/wiki/List_of_tz_database_time_zones
TZ=Asia/Shanghai
RESTART_POLICY=unless-stopped

# Postgres settings
## Documentation for this image and available settings can be found on hub.docker.com
## https://hub.docker.com/_/postgres
## Please keep in mind this will create a superuser and it's recommended to use a less privileged
## user to connect to the database.
## A guide on how to change the database user to a nonsuperuser can be found in docs/creation-of-nonsuperuser.md
POSTGRES_IMAGE_TAG=13-alpine
POSTGRES_DATA_PATH=./volumes/db/var/lib/postgresql/data

POSTGRES_USER=mattermost
POSTGRES_PASSWORD=your_strong_password
POSTGRES_DB=mattermost

# Nginx
## The nginx container will use a configuration found at the NGINX_MATTERMOST_CONFIG. The config aims
## to be secure and uses a catch-all server vhost which will work out-of-the-box. For additional settings
## or changes ones can edit it or provide another config. Important note: inside the container, nginx sources
## every config file inside */etc/nginx/conf.d* ending with a *.conf* file extension.

## Inside the container the uid and gid is 101. The folder owner can be set with
## `sudo chown -R 101:101 ./nginx` if needed.
#NGINX_IMAGE_TAG=alpine

## The folder containing server blocks and any additional config to nginx.conf
#NGINX_CONFIG_PATH=./nginx/conf.d
#NGINX_DHPARAMS_FILE=./nginx/dhparams4096.pem

#CERT_PATH=./volumes/web/cert/cert.pem
#KEY_PATH=./volumes/web/cert/key-no-password.pem
#GITLAB_PKI_CHAIN_PATH=<path_to_your_gitlab_pki>/pki_chain.pem
#CERT_PATH=./certs/etc/letsencrypt/live/${DOMAIN}/fullchain.pem
#KEY_PATH=./certs/etc/letsencrypt/live/${DOMAIN}/privkey.pem

## Exposed ports to the host. Inside the container 80, 443 and 8443 will be used
#HTTPS_PORT=443
#HTTP_PORT=80
#CALLS_PORT=8443

# Mattermost settings
## Inside the container the uid and gid is 2000. The folder owner can be set with
## `sudo chown -R 2000:2000 ./volumes/app/mattermost`.
MATTERMOST_CONFIG_PATH=./volumes/app/mattermost/config
MATTERMOST_DATA_PATH=./volumes/app/mattermost/data
MATTERMOST_LOGS_PATH=./volumes/app/mattermost/logs
MATTERMOST_PLUGINS_PATH=./volumes/app/mattermost/plugins
MATTERMOST_CLIENT_PLUGINS_PATH=./volumes/app/mattermost/client/plugins
MATTERMOST_BLEVE_INDEXES_PATH=./volumes/app/mattermost/bleve-indexes

## Bleve index (inside the container)
MM_BLEVESETTINGS_INDEXDIR=/mattermost/bleve-indexes

## This will be 'mattermost-enterprise-edition' or 'mattermost-team-edition' based on the version of Mattermost you're installing.
MATTERMOST_IMAGE=mattermost-team-edition
## Update the image tag if you want to upgrade your Mattermost version. You may also upgrade to the latest one. The example is based on the latest Mattermost ESR version.
MATTERMOST_IMAGE_TAG=latest

## Make Mattermost container readonly. This interferes with the regeneration of root.html inside the container. Only use
## it if you know what you're doing.
## See https://github.com/mattermost/docker/issues/18
MATTERMOST_CONTAINER_READONLY=false

## The app port is only relevant for using Mattermost without the nginx container as reverse proxy. This is not meant
## to be used with the internal HTTP server exposed but rather in case one wants to host several services on one host
## or for using it behind another existing reverse proxy.
APP_PORT=8065

## Configuration settings for Mattermost. Documentation on the variables and the settings itself can be found at
## https://docs.mattermost.com/administration/config-settings.html
## Keep in mind that variables set here will take precedence over the same setting in config.json. This includes
## the system console as well and settings set with env variables will be greyed out.

## Below one can find necessary settings to spin up the Mattermost container
MM_SQLSETTINGS_DRIVERNAME=postgres
MM_SQLSETTINGS_DATASOURCE=postgres://${POSTGRES_USER}:${POSTGRES_PASSWORD}@postgres:5432/${POSTGRES_DB}?sslmode=disable&connect_timeout=10

## Example settings (any additional setting added here also needs to be introduced in the docker-compose.yml)
MM_SERVICESETTINGS_SITEURL=https://${DOMAIN}
需要注意,在.env文件中,将DOMAIN修改为自己的用于访问服务器的域名,POSTGRES_PASSWORD配置为自己的数据库密码,其他的可以不用修改,然后保存
接下来在宿主机创建用于映射容器内数据的目录并设置权限
mkdir -p ./volumes/app/mattermost/{config,data,logs,plugins,client/plugins,bleve-indexes}
sudo chown -R 2000:2000 ./volumes/app/mattermost
然后执行docker compose up -d启动容器服务
Nginx配置
接下来,需要配置nginx进行反向代理,首先需要给域名申请一个SSL证书,可以用certbot进行申请
然后在/etc/nginx/conf.d/下创建mattermost.conf配置文件,然后写入下面内容
upstream backend {
   server 127.0.0.1:8065;
   keepalive 32;
}

server {
  listen 80;
  server_name   mm.yourdomain.com;
  return 301 https://$server_name$request_uri;
}

server {
   listen 443 ssl;
   http2 on;
   server_name    mm.yourdomain.com;

   # http2_push_preload on; # Enable HTTP/2 Server Push

   ssl_certificate /etc/letsencrypt/live/mm.yourdomain.com/fullchain.pem;
   ssl_certificate_key /etc/letsencrypt/live/mm.yourdomain.com/privkey.pem;
   ssl_session_timeout 1d;

   # Enable TLS versions (TLSv1.3 is required upcoming HTTP/3 QUIC).
   ssl_protocols TLSv1.2 TLSv1.3;

   # Enable TLSv1.3's 0-RTT. Use $ssl_early_data when reverse proxying to
   # prevent replay attacks.
   #
   # @see: https://nginx.org/en/docs/http/ngx_http_ssl_module.html#ssl_early_data
   ssl_early_data on;

   ssl_ciphers 'ECDHE-ECDSA-AES256-GCM-SHA384:ECDHE-RSA-AES256-GCM-SHA384:ECDHE-ECDSA-CHACHA20-POLY1305:ECDHE-RSA-CHACHA20-POLY1305:ECDHE-ECDSA-AES256-SHA384:ECDHE-RSA-AES256-SHA384';
   ssl_prefer_server_ciphers on;
   ssl_session_cache shared:SSL:50m;
   # HSTS (ngx_http_headers_module is required) (15768000 seconds = six months)
   add_header Strict-Transport-Security max-age=15768000;
   # OCSP Stapling ---
   # fetch OCSP records from URL in ssl_certificate and cache them
   ssl_stapling on;
   ssl_stapling_verify on;

   add_header X-Early-Data $tls1_3_early_data;

   location ~ /api/v[0-9]+/(users/)?websocket$ {
       proxy_set_header Upgrade $http_upgrade;
       proxy_set_header Connection "upgrade";
       client_max_body_size 50M;
       proxy_set_header Host $host;
       proxy_set_header X-Real-IP $remote_addr;
       proxy_set_header X-Forwarded-For $proxy_add_x_forwarded_for;
       proxy_set_header X-Forwarded-Proto $scheme;
       proxy_set_header X-Frame-Options SAMEORIGIN;
       proxy_buffers 256 16k;
       proxy_buffer_size 16k;
       client_body_timeout 60s;
       send_timeout 300s;
       lingering_timeout 5s;
       proxy_connect_timeout 90s;
       proxy_send_timeout 300s;
       proxy_read_timeout 90s;
       proxy_http_version 1.1;
       proxy_pass http://backend;
   }

   location / {
       client_max_body_size 100M;
       proxy_set_header Connection "";
       proxy_set_header Host $host;
       proxy_set_header X-Real-IP $remote_addr;
       proxy_set_header X-Forwarded-For $proxy_add_x_forwarded_for;
       proxy_set_header X-Forwarded-Proto $scheme;
       proxy_set_header X-Frame-Options SAMEORIGIN;
       proxy_buffers 256 16k;
       proxy_buffer_size 16k;
       proxy_read_timeout 600s;
       proxy_http_version 1.1;
       proxy_pass http://backend;
   }
}

# This block is useful for debugging TLS v1.3. Please feel free to remove this
# and use the `$ssl_early_data` variable exposed by NGINX directly should you
# wish to do so.
 map $ssl_early_data $tls1_3_early_data {
   "~." $ssl_early_data;
   default "";
 }
注意,需要将server_name和证书部分替换为自己的服务器域名和证书, 然后执行systemctl restart nginx使配置生效,然后就可以通过https://mm.yourdomain.com访问Mattermost服务啦
配置
我们通过域名访问服务后,首先需要注册一个账户将作为管理员
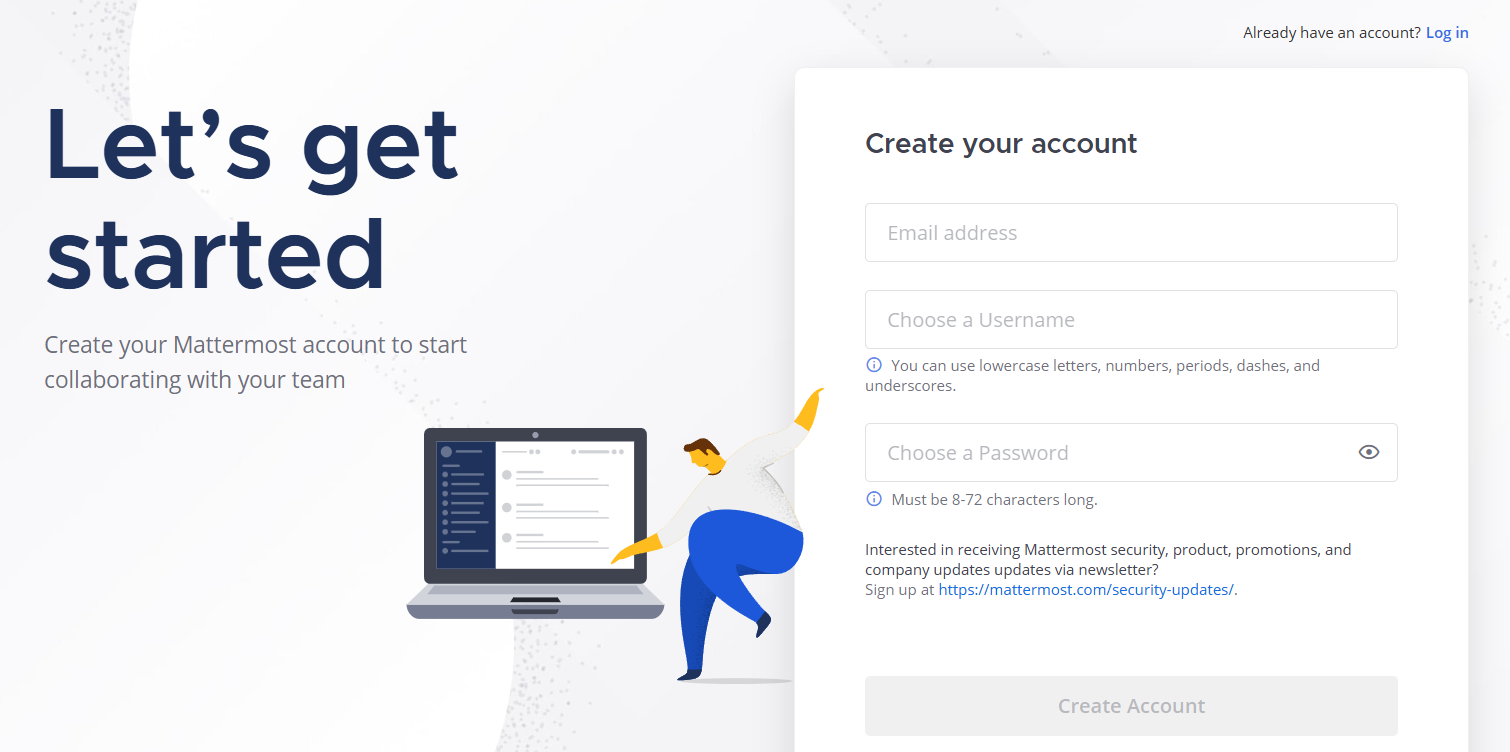
然后需要我们创建一个组织也就是团队,可以随便填一个名字(建议用英文就好,不要加下划线之类的符号,因为一开始加下划线后,后面创建工作区会一直卡住,去掉后就一切顺利,目前没有测试其他符号,可能是Bug,总之先注意一下)
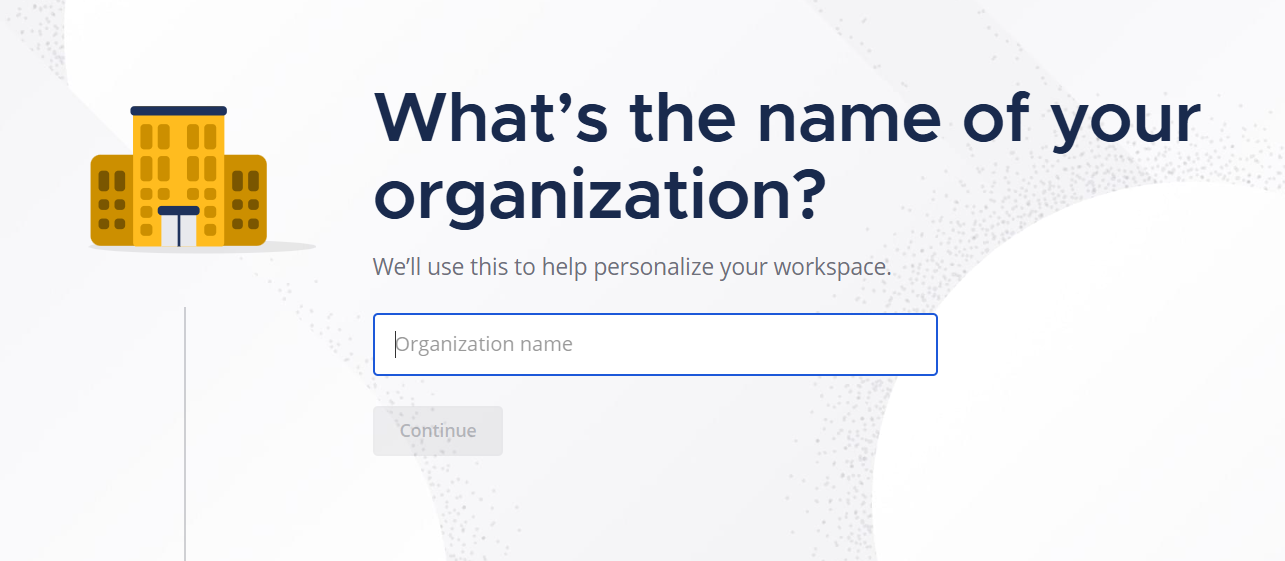
后面能跳过的就先跳过,最后点击Finish Setup,然后就创建好了
修改语言
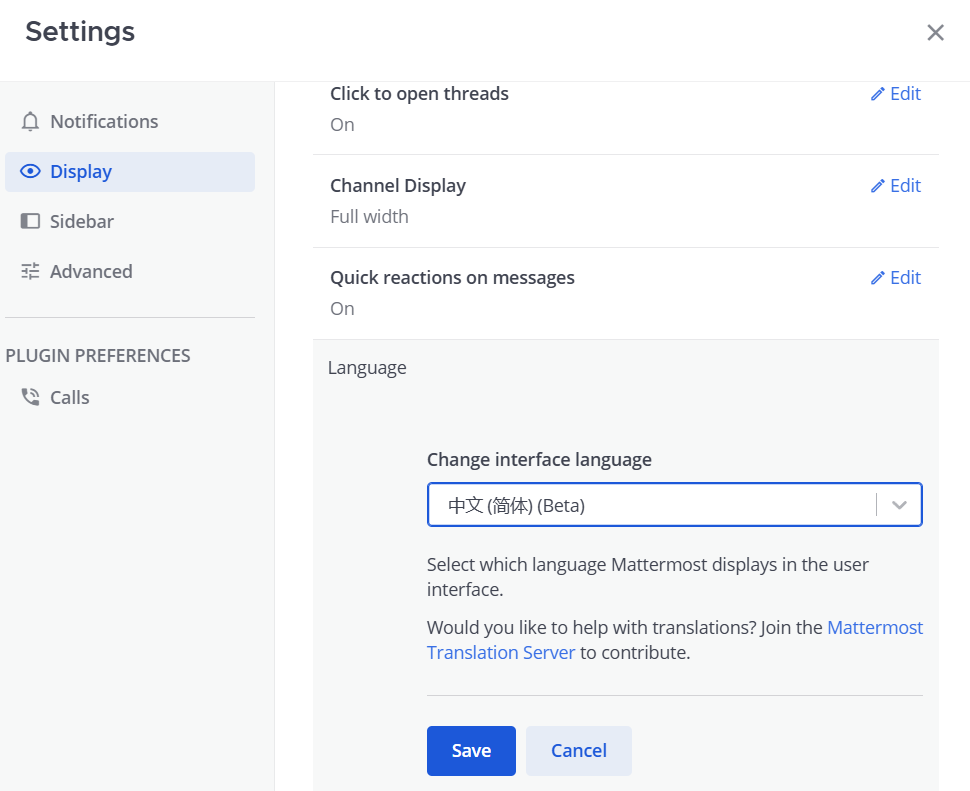
进入工作区后,可以在右上角设置中修改语言为中文
开放注册
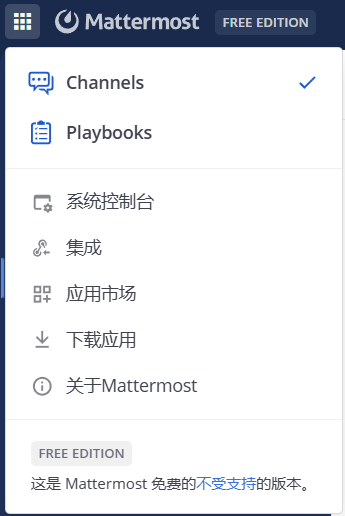
Mattermost默认是只能通过邀请注册,而不允许用户自己注册的,可以从左上角进入系统控制台,找到认证 - 注册一栏打开,然后在启用开放服务器选项选择是即可
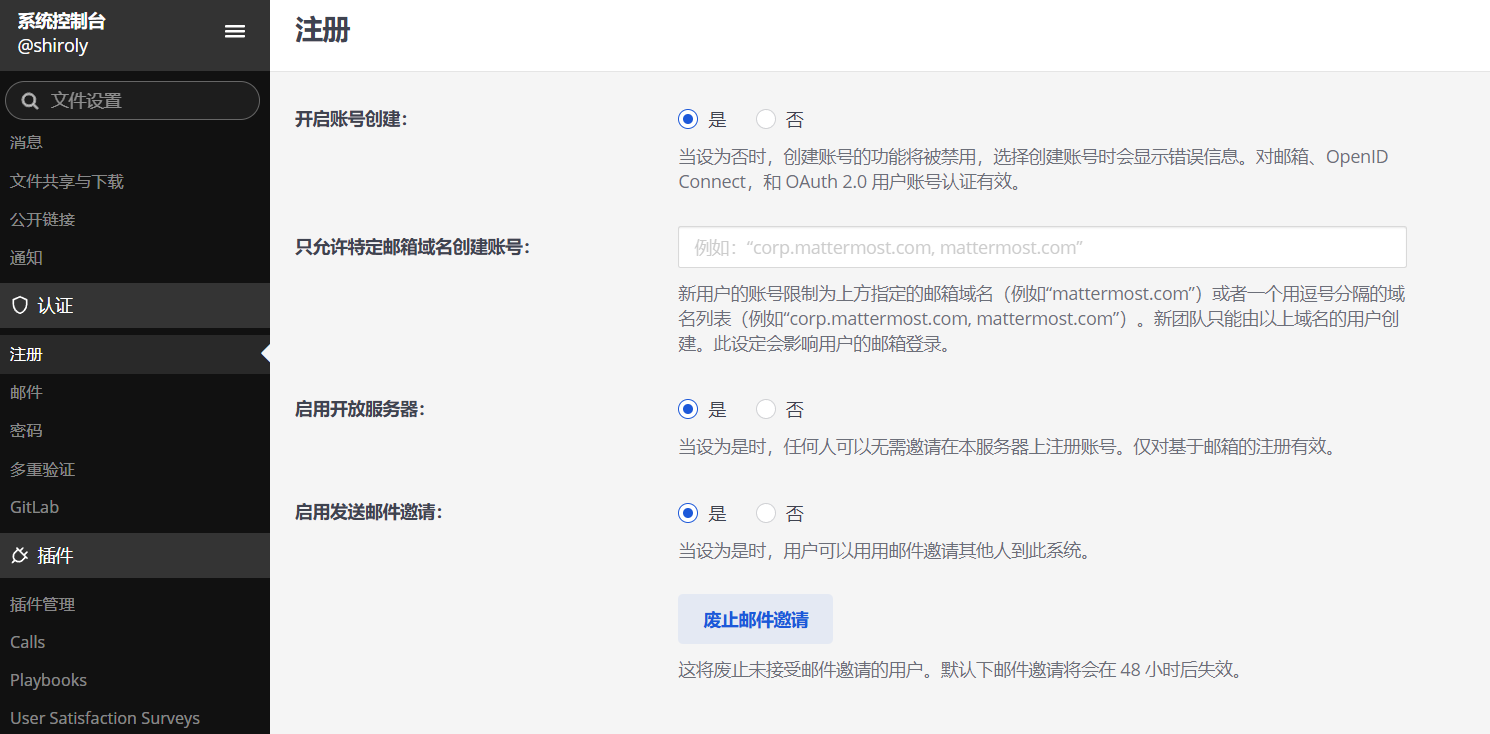
由于Mattermost要求用户注册后需要加入团队或创建团队,而我们此前默认创建的团队是不公开的,如果我们希望创建用户的时候直接加入已有团队,需要确保团队是公开的,这就需要点击团队名称,在访问一栏找到允许任何在本服务器上的用户加入此团队选项并勾选,这样新用户创建的时候能够直接加入进来,不然的话就需要邀请链接才行
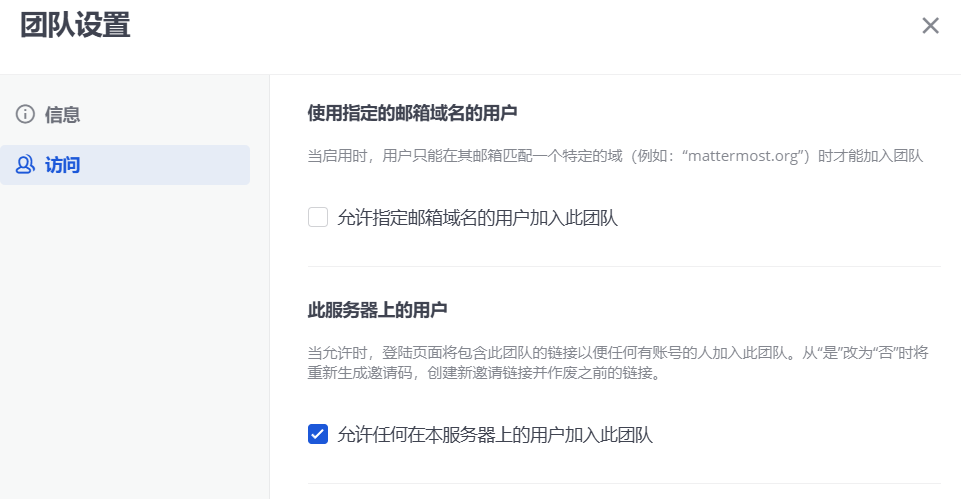
当然,为了防止恶意批量注册,建议注册选项在有需要的时候打开,平时关闭就好
配置SMTP通知
同样在系统控制台找到环境 - SMTP一栏打开,然后输入自己的SMTP服务器信息,具体需要根据自己使用的SMTP服务器设置,这里就不多介绍,但是需要注意的是,在配置完后并且确保没有错误的情况下,点击测试链接可能一直失败
如果出现这种情况,需要到系统控制台中找到站点配置 - 通知一栏打开,选择启用发送邮件通知,并配置来自地址的通知、客户支持邮件地址和通知 Reply-To 地址选项为前面设置的SMTP服务器用户名,例如[email protected],通知显示名称也可以设置一下
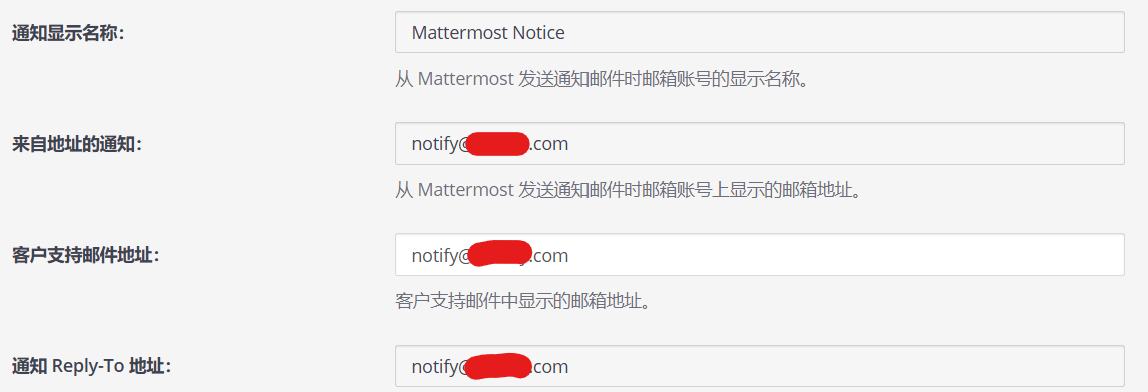
以上设置好保存后,再返回SMTP配置页面点击测试链接应该就成功了
启用发送邮件通知开启后,用户在受到各种信息的时候都会被发送邮件通知,如果不希望如此,可以在配置完后关闭该选项
写在最后
基本上感觉比Matrix Synapse更易用一些,配置起来相对更简单一些,后面先体验段时间看看吧,以后有需要再做补充吧