写在前面
Hyprland是一个开源的动态平铺窗口管理器(WM)和Wayland合成器(compositor),基于wlroots库开发,如许了解可以查看官方WiKi
注:与常用的KDE、Gnome等桌面环境(DE)不同,WM是一个轻量级组件,只负责窗口管理,并不会像DE一样提供全套桌面体验,因此它的极度依赖自定义,需要手动进行大量配置
本次配置记录的是在Archlinux系统上安装Hyprland WM,将从刚安装完Archlinux系统之后开始进行Hyprland安装配置的记录说明,本文将不再介绍和安装例如KDE等桌面环境,如需了解KDE桌面环境的安装,可以查看这里
简单放一张本次配置的桌面
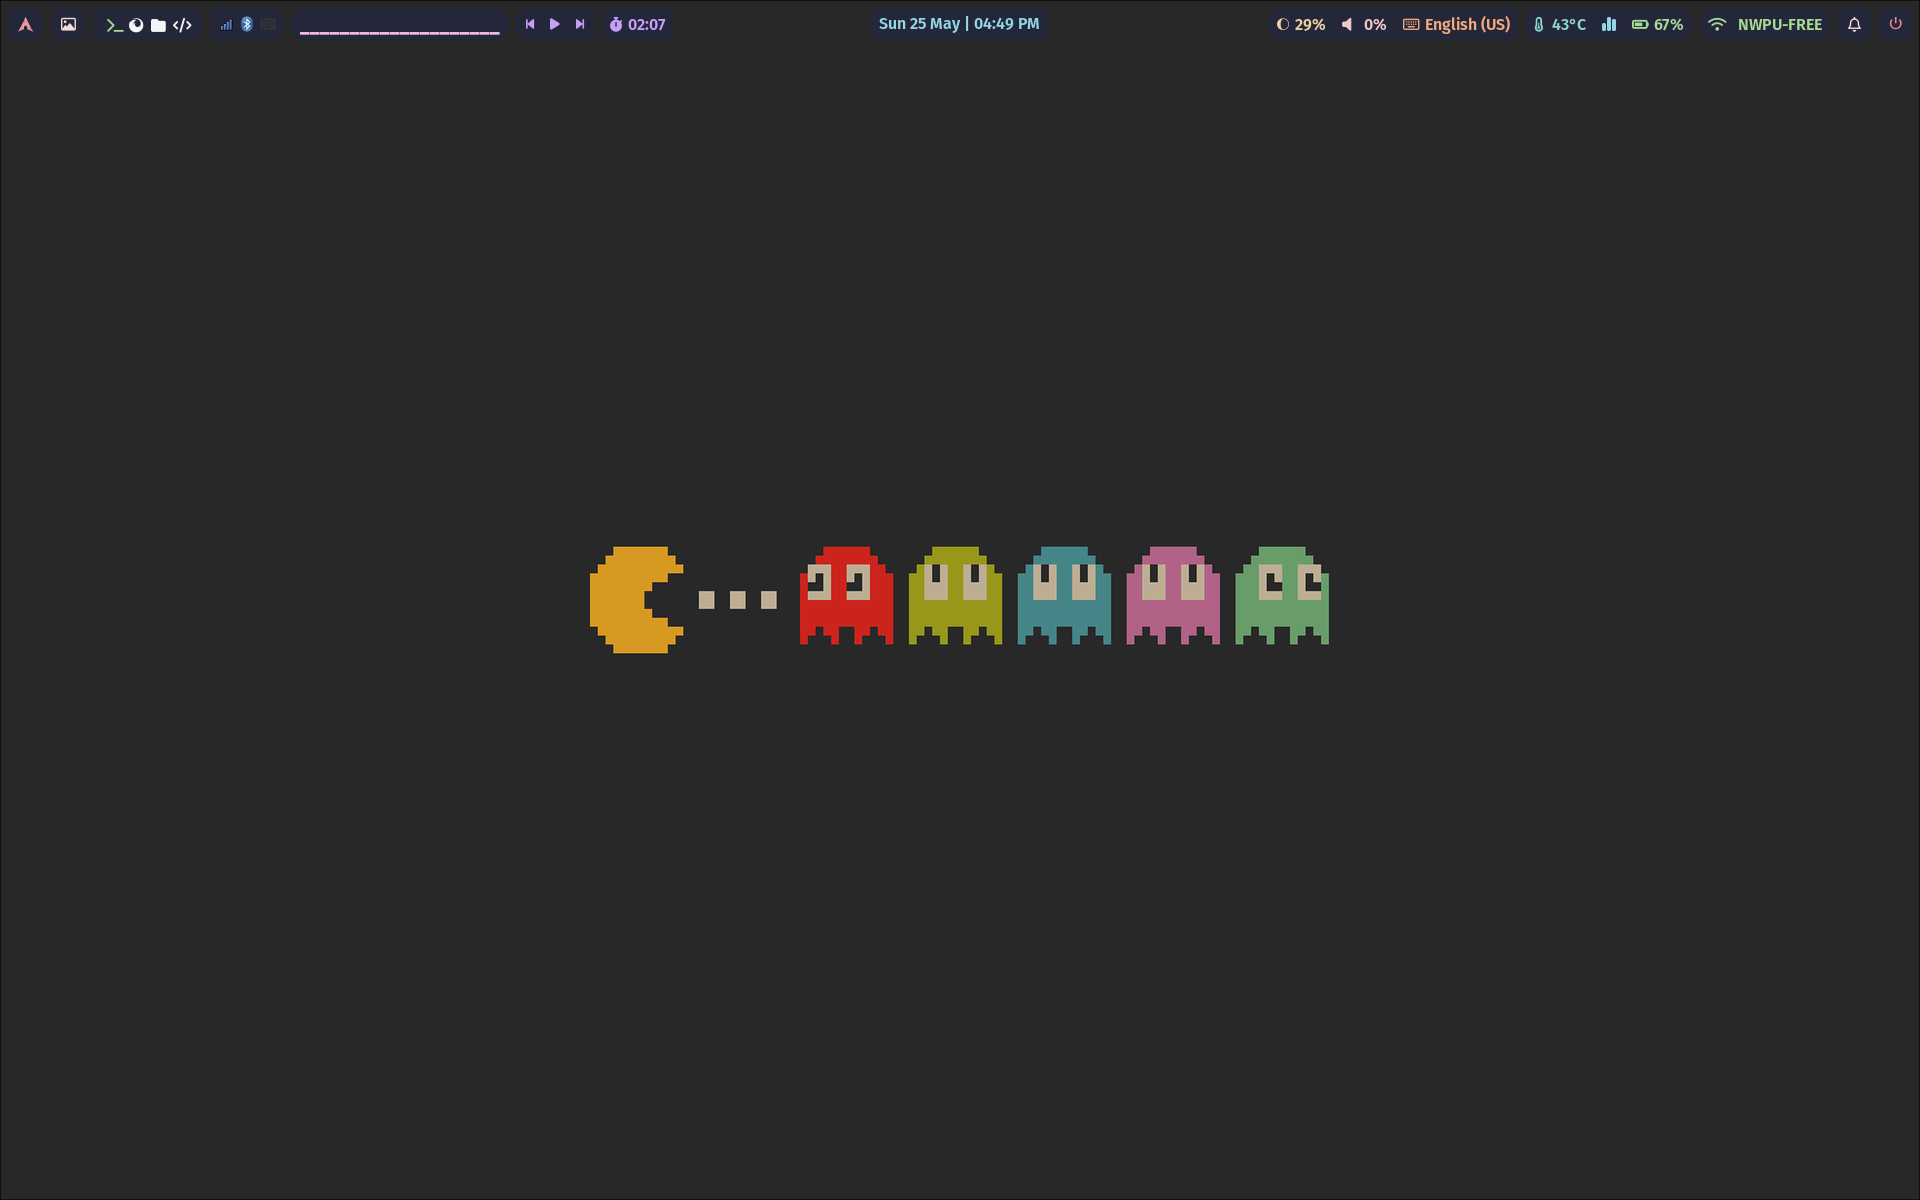
下面将从安装完Archlinux系统后的首次登录后开始记录
Archlinux配置
这部分内容为安装Archlinux后进行的一些必要配置,但不涉及Hyprland的内容,因为我是安装Archlinux后紧接着安装Hyprland并进行后续配置,所以在这里一并记录了下来
如果用的不是Archlinux或者Archlinux已经安装并配置好了可以跳过这部分直接到开始安装Hyprland的部分
连接网络
安装完系统后,依旧是需要先连接网络,执行iwctl进入iwd控制界面,然后与刚开始安装系统的时候一样进行网络连接,这里不再赘述
[iwd]# device list

[iwd]# station [device] scan

[iwd]# station [device] get-networks

[iwd]# station [device] connect [SSID]

[iwd]# exit
最后连接好后用命令行测试一下能ping通即可
更新系统
更新系统及签名
sudo pacman -Syu

sudo pacman -S archlinux-keyring
开启32位支持库和Archlinuxcn中文社区库
这里先开启32位支持库和Archlinuxcn社区库,方便一会先安装yay和paru等软件
编辑/etc/pacman.conf文件,将[multilib]部分的两行注释去掉即可开启32位库支持
[multilib]
Include = /etc/pacman.d/mirrorlist
然后在文件最下面添加以下内容来添加Archlinuxcn源,选一个添加即可:
[archlinuxcn]
Server = https://mirrors.ustc.edu.cn/archlinuxcn/$arch # 中国科学技术大学开源镜像站
Server = https://mirrors.tuna.tsinghua.edu.cn/archlinuxcn/$arch # 清华大学开源软件镜像站
Server = https://mirrors.hit.edu.cn/archlinuxcn/$arch # 哈尔滨工业大学开源镜像站
Server = https://repo.huaweicloud.com/archlinuxcn/$arch # 华为开源镜像站
然后执行下面指令刷新数据库并更新:
sudo pacman -S archlinuxcn-keyring  # 导入GPG key

sudo pacman -Syu  # 刷新数据库并更新
安装yay和paru
安装aur助手yay和paru,方便后续用来安装软件
这里更推荐用paru,它是yay作者用rust写的一款工具,它和yay在功能和使用上几乎一样,同时paru可以使用proxychains进行代理而yay不可以(与go语言特性有关)
sudo pacman -S yay paru base-devel
其中,base-devel包含了使用yay和paru安装软件必需的依赖
如果需要让yay命令走代理,可以在相应的Shell配置文件中配置alias如下
alias yay='https_proxy=socks5://127.0.0.1:10808 http_proxy=socks5://127.0.0.1:10808 yay' # 更改为自己的socks服务地址
安装Hyprland
接下来就要进行Hyprland的安装了。需要注意在开始安装的时候,需要同时安装Kitty终端和Sddm登陆管理器,由于Hyprland默认使用Kitty作为其终端,如果不安装的话,登陆后就无法调用出终端,你就只能对着电脑屏幕发呆了
sudo pacman -S hyprland kitty sddm
然后将Sddm设为开机自启
sudo systemctl enable sddm
接下来直接reboot重启,不出意外的话可以直接进入图形化界面的Sddm登陆管理器,选择Hyprland环境登陆进入,然后再进行后续操作
初识Hyprland环境
如果你正常登陆进入了Hyprland,默认上方会有一栏Warning,我们可以按照Warning提示,先用SUPER + Q打开Kitty终端,然后编辑~/.config/hypr/hyprland.conf,将autogenerated = 1这一行注释掉,就可以先解决掉烦人的Warning啦
PS1: 多数笔记本中
SUPER代表Windows键(就是键盘上有Windows系统图标的按键)PS2: 如果你跟我一样是第一次使用Hyprland,你就会发现初始桌面上一片空白,没有能用鼠标点的地方,因此开始的时候需要全程用键盘操作,下面提供了Hyprland默认的快捷键
默认快捷键:(可以在~/.config/hypr/hyprland.conf文件中修改)

SUPER + Q:打开终端
SUPER + C:关闭当前活动窗口
SUPER + 数字:切换工作区
SUPER + shift + 数字:将当前窗口移动到相应工作区
SUPER + 滚轮:切换工作区
SUPER + 鼠标左键:拖动窗口
SUPER + 鼠标右键:调整窗口大小
SUPER + V:让窗口浮动出来
SUPER + M:退出Hyprland
SUPER + R:启动应用程序启动器(默认为wofi,但不会默认安装,后面会进行修改)
SUPER + 方向键:切换活动窗口
开始配置前的一些软件包
在开始配置Hyprland及其组件之前,这部分想先介绍安装一些在后面会用到的基础软件包,这样也可以帮助我们后面配置的时候省去很多麻烦
另外需要注意下面介绍的软件并不都是必要的,只是我个人的配置需要,可以根据自己的情况安装
AMD GPU驱动
如果你的显卡跟我一样是AMD,那么可以执行下面命令(不适用于Nvidia显卡)
sudo pacman -S mesa lib32-mesa xf86-video-amdgpu vulkan-radeon lib32-vulkan-radeon
同时可以安装nvtop程序来查看GPU利用率
sudo pacman -S nvtop
一些开源字体和表情
按下面命令安装一些开源中文字体,后面基本就可以正常显示中文啦
sudo pacman -S adobe-source-han-sans-cn-fonts adobe-source-han-serif-cn-fonts wqy-microhei wqy-microhei-lite wqy-bitmapfont wqy-zenhei noto-fonts noto-fonts-cjk noto-fonts-emoji noto-fonts-extra
浏览器
安装火狐浏览器
sudo pacman -S firefox
蓝牙
安装蓝牙服务及其管理工具
sudo pacman -S bluez bluez-utils blueman
安装后启动蓝牙服务并设置开机自启
sudo systemctl enable --now bluetooth
Upower
Upower是一个用于查看电池和电源信息的工具
sudo pacman -S upower
安装完后启动并设置开机自启
sudo systemctl enable --now upower
Wayland支持组件
sudo pacman -S xdg-desktop-portal-hyprland xdg-desktop-portal-gtk qt5-wayland qt6-wayland
创建~/.config/xdg-desktop-portal/portals.conf文件,然后写入下面内容
[preferred]
default = hyprland;gtk
然后创建~/.config/hypr/xdg-portal.sh文件,写入下面内容
#!/bin/bash

sleep 1
killall xdg-desktop-portal-hyprland
killall xdg-desktop-portal-gtk
killall xdg-desktop-portal
/usr/lib/xdg-desktop-portal-hyprland &
sleep 2
/usr/lib/xdg-desktop-portal &
接下来编辑~/.config/hypr/hyprland.conf,添加以下内容
exec-once = ~/.config/hypr/xdg-portal.sh
exec-once = dbus-update-activation-environment --systemd --all
exec-once = systemctl --user import-environment WAYLAND_DISPLAY XDG_CURRENT_DESKTOP QT_QPA_PLATFORMTHEME
安装输入法工具
使用Fcitx5作为输入法执行下面命令进行安装
sudo pacman -S fcitx5-im fcitx5-chinese-addons fcitx5-anthy fcitx5-pinyin-moegirl fcitx5-material-color fcitx5-pinyin-zhwiki
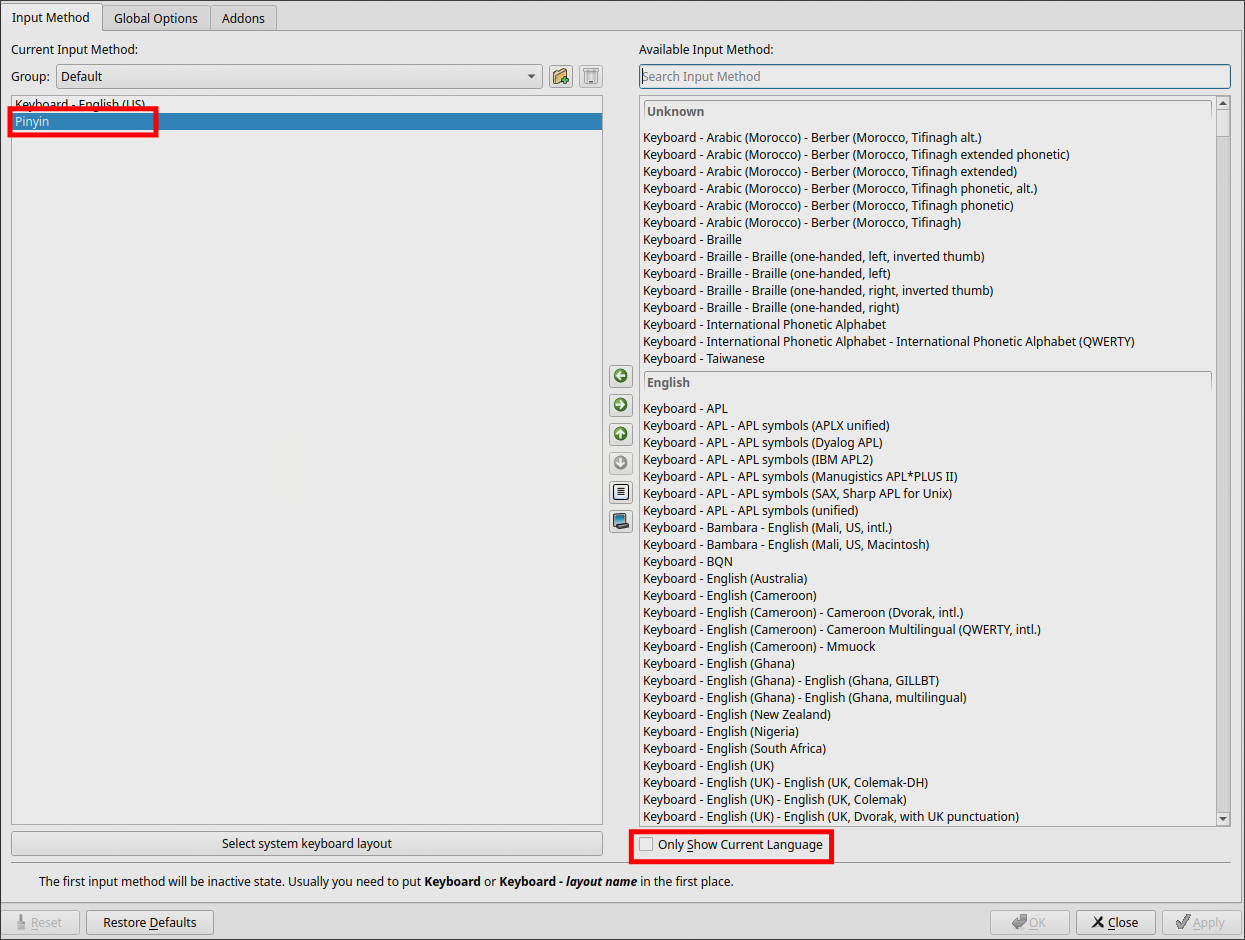
安装完后在终端执行fcitx5-configtool可以调出输入法配置面板,首先取消右下方的Only Show Current Language选项,然后在右侧的Available Input Method一栏里一直往下滑,可以找到Pinyin选项,双击将其添加到左边的Current Input Method栏中
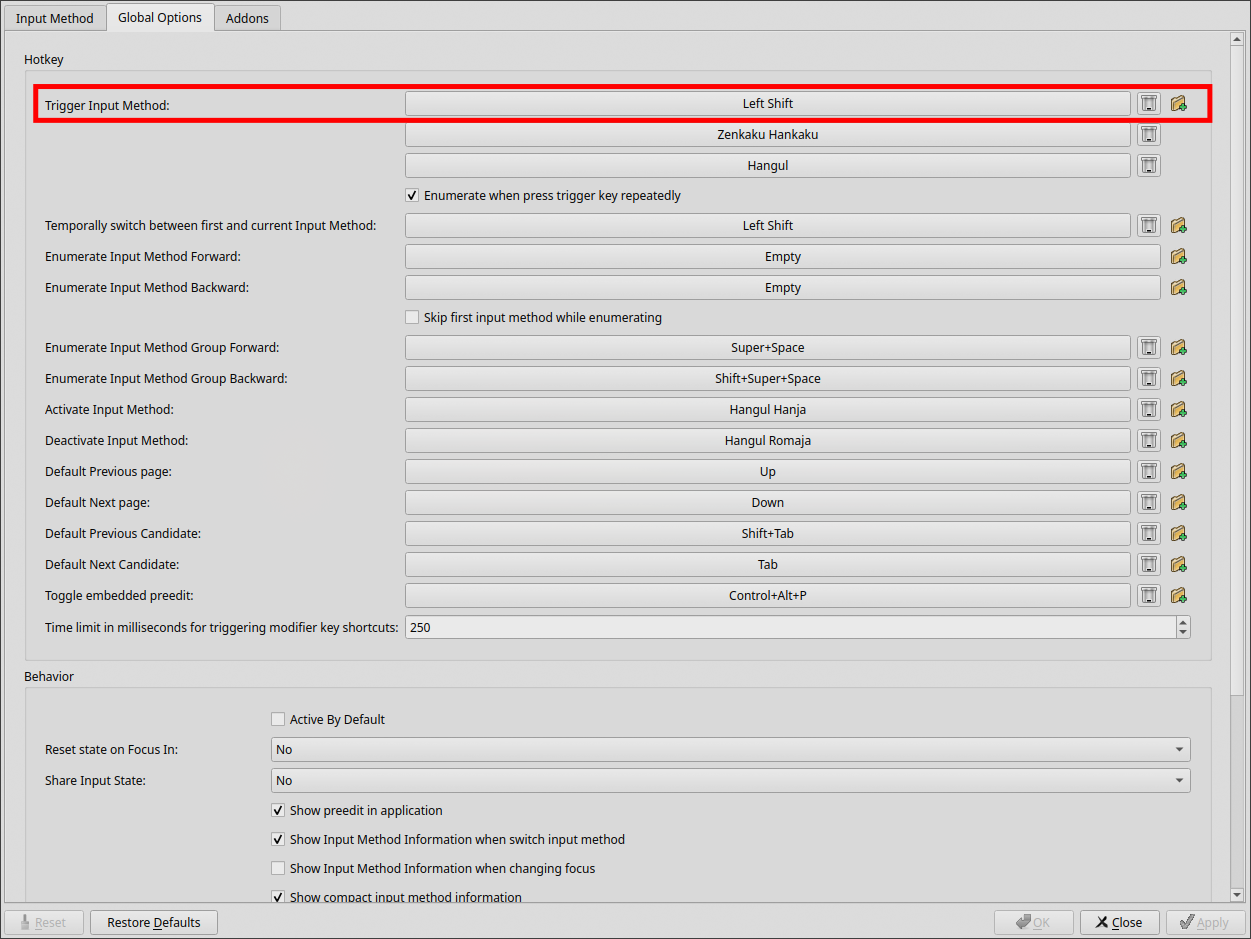
然后从上方选择Global Options进入,找到Trigger Input Method选项,将其快捷键改为左 Shift,然后点击右下方的Apply,这样后面我们就可以用左 Shift键切换输入法啦
下面的命令是根据我执行fcitx5调用时候出现的warning进行安装的,如果不影响使用可以选择不安装
sudo pacman -S libvoikko aspell hspell hunspell nuspell
可以先简单测试一下,在终端执行fcitx5,然后可以通过Shift切换输入法了,要开机启动的话只需要在后面Hyprland配置文件中设置即可
安装代理工具V2rayA
下面我们安装V2raya来作为代理软件,Xray作为内核,首先执行下面指令安装
sudo pacman -S v2raya xray

sudo systemctl enable --now v2raya  # 启动并配置开机自启
接下来要设置V2raya调用Xray内核(默认配置是调用V2ray内核,我们不使用V2ray也就没有安装),可参考官方文档,下面提供两种方法(只需要按一种设置即可,推荐第一种):
- 编辑修改
/etc/default/v2raya配置文件首先打开
/etc/default/v2raya文件sudo nano /etc/default/v2raya然后找到
V2RAYA_V2RAY_BIN和V2RAYA_V2RAY_ASSETSDIR两个环境变量,将其前面的#去掉,并将其值按如下修改V2RAYA_V2RAY_BIN=/usr/bin/xray V2RAYA_V2RAY_ASSETSDIR=/usr/share/xray其中
/usr/bin/xray指的是xray可执行文件,而/usr/share/xray指的是xray数据文件目录(包含了geosite.dat和geoip.dat文件)然后重启
v2raya服务即可sudo systemctl restart v2raya
- 编辑修改
systemd管理的配置文件新建一个文件夹
/etc/systemd/system/v2raya.service.d,然后进入文件夹新建一个文件xray.conf,类似的,写入以下内容[Service] Environment="V2RAYA_V2RAY_BIN=/usr/bin/xray" Environment="V2RAYA_V2RAY_ASSETSDIR=/usr/share/xray"然后执行下面指令重新加载
V2rayA服务即可sudo systemctl daemon-reload && sudo systemctl restart v2raya
然后我们直接在终端执行firefox进入火狐浏览器,然后访问http://127.0.0.1:2017进入V2raya配置界面,导入自己的配置规则
下面重点说一下路由分流,由于我习惯使用浏览器插件Zero Omega来配置代理,所以通常仅开启代理服务器但不启动系统代理,因此流量通过浏览器插件转发至代理服务器,然后再进行路由选择,具体配置如下
点击右上角的设置,关闭透明代理/系统代理选项,然后将规则端口的分流模式选为RoutingA,随后点击右边的配置选项,写入以下内容(用默认配置不改也行,也可以根据自己的需要更改):
default: proxy
# write your own rules below

domain(geosite:cn)->direct
ip(geoip:private)->direct
ip(geoip:cn)->direct
然后点击保存,注意此时这些规则并不会生效,因为V2rayA为socks协议和http协议设置了带分流规则的端口(该端口进来的流量会按照分流规则分流)和不带分流规则端口(该端口进来的流量并不会按照规则分流),而且默认只设置了http的分流端口,因此需要我们下面手动设置带分流规则的端口
我们可以点开设置页面左下角的地址与端口选项,然后填写带分流规则的socks端口并保存,如下图:
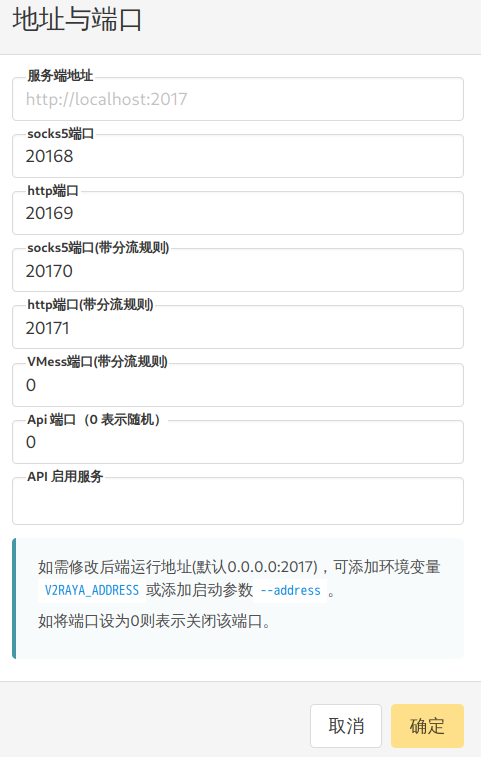
然后在Zero Omega中设置为带分流端口的socks地址,按上图也就是socks5://127.0.0.1:20170,这样流量就可以正常分流了
安装Proxychains
主要方便日后paru、git等命令行工具使用代理
sudo pacman -S proxychains
编辑/etc/proxychains.conf,找到最下方的[ProxyList],添加上一步中v2raya设置的代理,例如
[ProxyList]
socks5  127.0.0.1  20170
然后就可以用proxychains让有些需要访问网络的命令行工具走代理啦
安装音频和屏幕管理工具
主要是安装一些音视频框架与屏幕亮度相关管理工具包,这里不再详述
sudo pacman -S pipewire pipewire-jack pipewire-alsa pipewire-pulse wireplumber rtkit light alsa-utils brightnessctl playerctl
设置开机自启并立即启动用户级的pipewire和pipewire-pulse服务
systemctl —-user enable —-now pipewire pipewire-pulse
安装Snapper
Snapper是一个由SUSE工程师开发的在Btrfs文件系统使用的的快照管理工具,用于恢复系统或撤销一些操作,如果使用了Btrfs文件系统的话强烈建议安装,如果是Ext4文件系统的话则不需要安装,具体安装和使用方法可以参考我的这篇文章,这里不在赘述
Hyprland配置和美化
接下来就是关键的Hyprland配置及美化了,考虑到要兼顾美观、实用和简洁,在参考了很多Github上的配置方案后,针对我自己的要求对一些配置进行了改良,下面就记录一下
- PS1:原本想尽量详细介绍一下每一项配置,但是后来发现组件实在太多,而且设计多个组件同时配置,同时配置文件内容较长,因此大部分组件的具体配置内容将不在本文详细说明,如需具体配置可以评论或TG
Hyprland配置文件
首先介绍一下Hyprland的配置文件hyprland.conf,这个文件包含了用于定义Hyprland行为、外观、快捷键和环境变量等功能和信息,其配置文件的路径位于~/.config/hypr/hyprland.conf,当我们安装了Hyprland后会自动生成,如果需要调整窗口管理器的配置就可以直接编辑修改
后面的许多组件的配置都会涉及到调整和修改Hyprland配置文件
接下来的内容主要就开始介绍各种组件的安装和配置
Hyprlock
Hyprlock是Hyprland生态下的一款锁屏工具
执行下面命令进行安装
sudo pacman -S hyprlock
然后将其配置一下,需要创建并编辑.config/hypr/hyprlock.conf,写入以下配置(官方文档里提供的一些配置,我觉得效果不错暂时就直接用了)
background {
    monitor =
    path = screenshot
    color = rgba(25, 20, 20, 1.0)
    blur_passes = 2
}

input-field {
    monitor =
    size = 20%, 5%
    outline_thickness = 3
    inner_color = rgba(0, 0, 0, 0.0) # no fill

    outer_color = rgba(33ccffee) rgba(00ff99ee) 45deg
    check_color=rgba(00ff99ee) rgba(ff6633ee) 120deg
    fail_color=rgba(ff6633ee) rgba(ff0066ee) 40deg

    font_color = rgb(143, 143, 143)
    fade_on_empty = false
    rounding = 15

    position = 0, -20
    halign = center
    valign = center
}

label {
    monitor =
    text = Hi there, $USER
    color = rgba(200, 200, 200, 1.0)
    font_size = 25
    font_family = Noto Sans

    position = 0, 80
    halign = center
    valign = center
}
如果需要用快捷键调用锁屏,可以编辑~/.config/hypr/hyprland,写入下面内容(可以按照自己需要修改快捷键)
$screenlock = hyprlock
bind = $mainMod, L, exec, $screelock
我设置的是用Win + L进行锁屏
Waybar
Waybar是一款高度可定制的状态栏工具,下面先安装Waybar和一些要用到的字体文件
sudo pacman -S waybar ttf-font-awesome ttf-jetbrains-mono-nerd ttf-jetbrains-mono
然后命令行执行waybar就可以看到上方的状态栏了,但默认的显示出来可能并不好看,我们可以进行一下美化,具体配置细节在GitHub上提供了wiki文档可以参考
具体配置主要包含在~/.config/waybar/config和~/.config/waybar/style.css两个文件中
Rofi
Rofi是一个功能强大的窗口切换器、应用启动器和dmenu替代品,最初为X11设计,现通过Rofi-Wayland分支支持Wayland,执行下面命令安装
sudo pacman -S rofi-wayland
Rofi的配置目录位于~/.config/rofi,我采用了Github上star比较多的一个Rofi配置项目adi1090x/rofi,有需要的可以自行参考
可以根据Github中的说明进行主题安装,安装方法如下
$ git clone --depth=1 https://github.com/adi1090x/rofi.git

$ cd rofi
$ chmod +x setup.sh

$ ./setup.sh
具体用到的是项目中的Launchers和Powermenus部分,下面针对我用到的配置进行简单说明
- 应用启动器(Launchers)
我采用的Launchers主题是Type-3的Style-2,Color选择的是gruvbox.rasi
首先需要编辑~/.config/rofi/launchers/type-3/launcher.sh,将下面这行改为Style-2
theme='style-2'
然后编辑~/.config/rofi/launchers/type-3/shared/colors.rasi,将下面这行改为gruvbox.rasi
@import "~/.config/rofi/colors/gruvbox.rasi"
可以根据需要编辑~/.config/rofi/launchers/type-3/shared/fonts.rasi来修改字体和字号如下
* {
    font: "JetBrains Mono Nerd Font 16";
}
也可以编辑~/.config/rofi/launchers/type-3/style-2.rasi来调整样式,要让背景显示gruvbox的颜色可以做如下修改
window {
...
background-color: @background;
...
}
或者想给背景加点透明也可以这样设置
window {
...
background-color: rgba(0, 0, 0, 0.8);
...
}
然后可以执行bash ~/.config/rofi/launchers/type-3/launcher.sh测试一下

最后就是将命令执行添加到我在Waybar配置文件中的launcher模块就可以从Waybar中启动啦
- 电源菜单Powermenus
我采用的Powermenus主题是Type-1的Style-2,Color同样选择gruvbox.rasi
首先编辑~/.config/rofi/powermenu/type-1/powermenu.sh,将下面这行改为Style-2
theme='style-2'
然后编辑~/.config/rofi/powermenu/type-1/shared/colors.rasi,将下面这行改为gruvbox.rasi
@import "~/.config/rofi/colors/gruvbox.rasi"
根据需要编辑~/.config/rofi/powermenu/type-1/shared/fonts.rasi来修改字体和字号,这里我把字号修改为了16
* {
    font: "JetBrains Mono Nerd Font 16";
}
由于字号增大了,需要将会话框相应增大,以防止显示不全,需要编辑~/.config/rofi/powermenu/type-1/powermenu.sh,找到confirm_cmd()函数,将其中的width从250px增加到500px
由于这个主题项目并没有考虑适配Wayland环境,因此还需要对脚本进行修改,继续编辑~/.config/rofi/powermenu/type-1/powermenu.sh,找到run_cmd()函数,在--logout部分进行修改如下
elif [[ hyprland... ]]; then
hyprctl...
接着找到文件最后的Actions部分,将锁屏命令替换为我们前面安装的hyprlock,修改如下
if [[ hyprlock... ]]; then
hyprlock
由于脚本还用到了hostname和mpc命令所以需要安装下面的包
sudo pacman -S inetutils mpc
可以执行bash ~/.config/rofi/powermenu/type-1/powermenu.sh测试一下
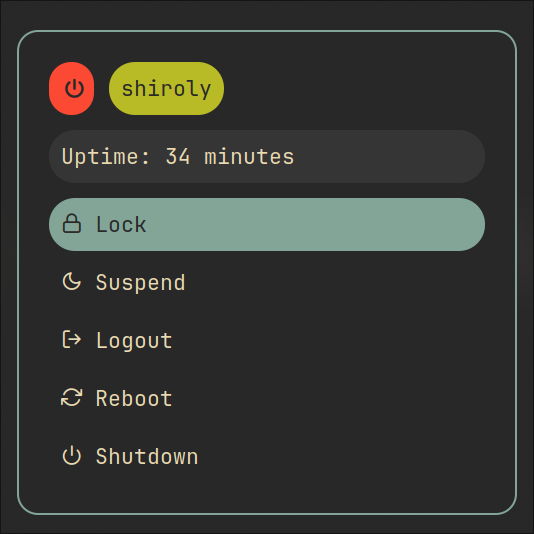
最后同样将命令执行添加到Waybar配置文件中的的power模块就可以从Waybar调用啦
Tofi
Tofi也是一个应用启动器,我个人觉得也挺好用的,就都安装了,直接执行下面命令安装
sudo pacman -S tofi
Tofi的配置文件位于~/.config/tofi/config
Kitty
对Kitty使用了Gruvbox的配色方案
配置文件包含在~/.config/kitty/kitty.conf和~/.config/kitty/theme.conf
Fish Shell
下面将安装Fish Shell作为默认Shell使用,同时安装Shell美化工具(pokemon-colorscripts-git)、命令行纠错工具(thefuck)和分页器(most),执行下面命令安装
paro - S fish pokemon-colorscripts-git thefuck most
更改默认shell
chsh -s /usr/bin/fish
安装OhMyFish框架,执行Github上的安装脚本,因为网络问题,所以我在命令前面添加了代理
proxychains curl https://raw.githubusercontent.com/oh-my-fish/oh-my-fish/master/bin/install | proxychains fish
安装完后会自动加载到Fish的配置里,可以用omf命令进行操作,例如安装喜欢的主题
omf install nai
然后就是在Fish配置文件中配置一下前面安装的pokemon-colorscripts-git、thefuck和most这三个工具
其中pokemon-colorscripts-git和most需要在~/.config/fish/config.fish文件中添加配置,内容如下
if status is-interactive
    # Commands to run in interactive sessions can go here
    pokemon-colorscripts -r --no-title
end
set fish_greeting

export PAGER='most'
thefuck可以参考Github说明进行新建~/.config/fish/functions/fuck.fish进行配置,内容如下
function fuck -d "Correct your previous console command"
  set -l fucked_up_command $history[1]
  env TF_SHELL=fish TF_ALIAS=fuck PYTHONIOENCODING=utf-8 thefuck $fucked_up_command THEFUCK_ARGUMENT_PLACEHOLDER $argv | read -l unfucked_command
  if [ "$unfucked_command" != "" ]
    eval $unfucked_command
    builtin history delete --exact --case-sensitive -- $fucked_up_command
    builtin history merge
  end
end
swww
swww是一个专为Wayland环境设计的轻量、高效的壁纸管理工具,可以执行下面命令安装
sudo pacman -S swww
准备一个~/.config/wallpaper目录存放壁纸
在~/.config/hypr/hyprland.conf添加开机自启
exec-once = swww-daemon
然后在Waybar配置文件中的wallpaper模块中添加配置用于在Waybar中一键切换壁纸,并设置了能够右键换回一张固定壁纸
"custom/wallpaper": {
"format": " ",
"on-click": "swww img $HOME/.config/wallpapers/$(ls $HOME/.config/wallpapers | shuf -n 1) --transition-type center --transition-fps 60 --transition-duration 6",
"on-click-right": "swww img $HOME/.config/wallpapers/gruvbox19.png --transition-type center --transition-fps 60 --transition-duration 6"
}
Swaync
Swaync是一个现代化的通知守护进程,提供通知管理和交互式控制中心,支持自定义,首先通过下面命令安装
sudo pacman -S swaync
它的配置目录位于~/.config/swaync/,可以根据需要进行配置和美化,内容较长就不在这里展示
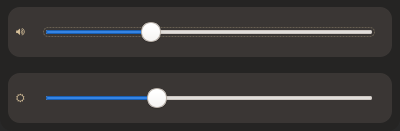
注:在
config.json中配置Widgets的时候发现控制亮度的backlight组件一开始没有显示,需要指定device名字才可以正常显示,可以ls /sys/class/backlight查看,例如我的是amdgpu_bl1,因此需要手动指定如下"widget-config": { "inhibitors": { "text": "Inhibitors", "button-text": "Clear All", "clear-all-button": true }, "title": { "text": "Notifications", "clear-all-button": true, "button-text": "Clear All" }, "dnd": { "text": "Do Not Disturb" }, "volume": { "label": " " }, "backlight": { "label": " ", "device": "amdgpu_bl1" } }然后就可以像下面这样正常显示啦
接下来需要在~/.config/hypr/hyprland.conf添加开机自启
exec-once = swaync
最后在Waybar配置中添加相应的Notification部分,用于在Waybar中显示通知按钮
"custom/notification": {
"tooltip": false,
"format": "{icon}",
"format-icons": {
"notification": "",
"none": "",
"dnd-notification": "<span foreground='#ea6962'></span>",
"dnd-none": "<span foreground='#ea6962'></span>",
"inhibited-notification": "",
"inhibited-none": "",
"dnd-inhibited-notification": "<span foreground='#ea6962'></span>",
"dnd-inhibited-none": "<span foreground='#ea6962'></span>"
},
"return-type": "json",
"exec-if": "which swaync-client",
"exec": "swaync-client -swb",
"on-click": "swaync-client -t -sw",
"on-click-right": "swaync-client -d -sw",
"escape": true
}
Zathura
Zathura是一个轻量、高度可定制的PDF文档查看器,执行下面命令安装
sudo pacman -S tesseract-data-eng tesseract-data-chi_sim zathura zathura-pdf-mupdf
Zathura的配置目录位于~/.config/zathura/,可以进行简单配置
NeoVim
Neovim的安装直接用包管理器就好
sudo pacman -S neovim
然后我使用的LazyVim项目进行的配置,关于LazyVim的安装可以直接到它的官网查看,这里就不详述了
唯一需要说的一点是,在国内安装的话可能速度会比较慢,可以选择在执行有下载内容的命令的时候添加代理,但是测试发现如果使用proxychains可能会有问题,可以使用下面这种方法
https_proxy=socks5://127.0.0.1:10808 http_proxy=socks5://127.0.0.1:10808 nvim # 相当于只给这条命令添加代理执行
Mpd Mpc Ncmpcpp
Mpd(Music Player Daemon)是一个服务器-客户端架构的音频播放器,占用极少资源的同时有着播放音频、管理播放列表和音乐等功能,与它进行交互需要一个单独的客户端,例如Mpc(命令行工具)和Ncmpcpp(TUI工具)
有关这几个工具的安装和配置可以参考它们的Archwiki或按照下面步骤进行
首先安装服务端和两个客户端工具
sudo pacman -S mpd

sudo pacman -S mpc

sudo pacman -S ncmpcpp
Mpd
对于Mpd服务端,首先创建配置文件
mkdir -p ~/.config/mpd

cp /usr/share/doc/mpd/mpdconf.example ~/.config/mpd/mpd.conf
写入以下配置(前面已安装了Pipewire)
music_directory    "~/Musics"
playlist_directory    "~/.config/mpd/playlists"
db_file     "~/.config/mpd/database"
pid_file    "~/.config/mpd/pid"
state_file    "~/.config/mpd/state"
sticker_file    "~/.config/mpd/sticker.sql"
auto_update    "yes"

audio_output {
	type		"pipewire"
	name		"PipeWire Sound Server"
}
创建播放列表目录和音乐目录
mkdir ~/.config/mpd/playlists ~/Musics
启动Mpd服务并设置开机自启
systemctl --user enable --now mpd
Mpd服务端配置就简单完成啦
Mpc
下面介绍一下命令行客户端工具Mpc的使用
可以将音乐文件添加到我们前面Mpd设置的~/Musics目录,然后执行下面命令更新音乐库
mpc update
然后测试一下播放音乐
mpc listall  # 列出音乐库所有文件

mpc add <music_file_name>  # 将音乐文件添加到播放列表

mpc play  # 开始播放当前曲目
下面列了一些Mpc的常用命令
# 基本控制操作
mpc play  # 开始播放当前曲目。
mpc pause  # 暂停播放。
mpc toggle  # 切换播放/暂停状态。
mpc stop  # 停止播放。
mpc next  # 播放下一首曲目。
mpc prev  # 播放上一首曲目。

# 播放列表管理
mpc playlist  # 显示当前播放列表。
mpc add <文件/目录>  # 将文件或目录添加到播放列表(例如 mpc add file.mp3)。
mpc clear  # 清空当前播放列表。
mpc rm <播放列表名>  # 删除指定的播放列表。
mpc load <播放列表名>  # 加载保存的播放列表。
mpc lsplaylists  # 列出所有保存的播放列表。

# 音量控制
mpc volume [值]  # 设置音量(0-100,例如 mpc volume 50)。
mpc volume +[值]  # 增加音量(例如 mpc volume +10)。
mpc volume -[值]  # 降低音量(例如 mpc volume -10)。

# 播放模式
mpc random [on|off]  # 开启或关闭随机播放。
mpc repeat [on|off]  # 开启或关闭重复播放。
mpc single [on|off]  # 开启或关闭单曲循环。
mpc consume [on|off]  # 开启或关闭播放后从列表移除曲目。

# 当前状态和信息
mpc status  # 显示当前播放状态(包括曲目、音量、播放模式等)。
mpc current  # 显示当前播放的曲目。
mpc stats  # 显示 MPD 服务器统计信息(如总曲目数、播放时间等)。

# 音乐库管理
mpc ls [路径]  # 列出音乐库中的文件或目录(例如 mpc ls music/)。
mpc update  # 更新音乐库(扫描新文件或移除不存在的文件)。
mpc search <类型> <查询>  # 搜索音乐库(例如 mpc search artist "Beatles")。
Ncmpcpp
接下来是TUI客户端Ncmpcpp的使用,首先编辑~/.config/mpd/mpd.conf,写入下面内容
audio_output {
    type                    "fifo"
    name                    "my_fifo"
    path                    "/tmp/mpd.fifo"
    format                  "44100:16:2"
}
重启一下Mpd服务
systemctl --user restart mpd
然后创建Ncmpcpp的配置文件
mkdir -p ~/.config/ncmpcpp

cp /usr/share/doc/ncmpcpp/config ~/.config/ncmpcpp/
根据前面Mpd中的配置,写入以下配置
mpd_host = localhost
mpd_port = 6600
mpd_music_dir = ~/Musics

visualizer_data_source = "/tmp/mpd.fifo"
visualizer_output_name = "my_fifo"
visualizer_in_stereo = "yes"
visualizer_type = "spectrum"
visualizer_look = "+|"

execute_on_song_change = notify-send "Now Playing" "$(mpc --format '%title% \n%artist% - %album%' current)"
然后终端运行ncmpcpp就可以打开TUI客户端啦,按F1可以调出快捷键说明菜单,最后尝试一下可以正常播放音乐啦
最后,可以在Waybar中添加相应的Mpd模块,用于添加控制音乐播放的按钮
cava
cava是一个开源的音频可视化工具,用于在终端也可以在Waybar中以条形频谱的形式显示音频波形
首先执行下面指令安装
sudo pacman -S cava
创建两个配置文件,其中config用于cava在终端的默认配置,config-waybar用于在Waybar中的配置
mkdir ~/.config/cava

touch ~/.config/cava/config

touch ~/.config/cava/config-waybar
在~/.config/cava/config写入以下默认配置,可根据自己的情况取消注释调整
## Configuration file for CAVA. Default values are commented out. Use either ';' or '#' for commenting.


[general]

# Smoothing mode. Can be 'normal', 'scientific' or 'waves'. DEPRECATED as of 0.6.0
; mode = normal

# Accepts only non-negative values.
; framerate = 60

# 'autosens' will attempt to decrease sensitivity if the bars peak. 1 = on, 0 = off
# new as of 0.6.0 autosens of low values (dynamic range)
# 'overshoot' allows bars to overshoot (in % of terminal height) without initiating autosens. DEPRECATED as of 0.6.0
; autosens = 1
; overshoot = 20

# Manual sensitivity in %. If autosens is enabled, this will only be the initial value.
# 200 means double height. Accepts only non-negative values.
; sensitivity = 100

# The number of bars (0-200). 0 sets it to auto (fill up console).
# Bars' width and space between bars in number of characters.
; bars = 0
; bar_width = 2
; bar_spacing = 1
# bar_height is only used for output in "noritake" format
; bar_height = 32

# For SDL width and space between bars is in pixels, defaults are:
; bar_width = 20
; bar_spacing = 5


# Lower and higher cutoff frequencies for lowest and highest bars
# the bandwidth of the visualizer.
# Note: there is a minimum total bandwidth of 43Mhz x number of bars.
# Cava will automatically increase the higher cutoff if a too low band is specified.
; lower_cutoff_freq = 50
; higher_cutoff_freq = 10000


# Seconds with no input before cava goes to sleep mode. Cava will not perform FFT or drawing and
# only check for input once per second. Cava will wake up once input is detected. 0 = disable.
; sleep_timer = 0


[input]

# Audio capturing method. Possible methods are: 'pulse', 'alsa', 'fifo', 'sndio' or 'shmem'
# Defaults to 'pulse', 'alsa' or 'fifo', in that order, dependent on what support cava was built with.
#
# All input methods uses the same config variable 'source'
# to define where it should get the audio.
#
# For pulseaudio 'source' will be the source. Default: 'auto', which uses the monitor source of the default sink
# (all pulseaudio sinks(outputs) have 'monitor' sources(inputs) associated with them).
#
# For alsa 'source' will be the capture device.
# For fifo 'source' will be the path to fifo-file.
# For shmem 'source' will be /squeezelite-AA:BB:CC:DD:EE:FF where 'AA:BB:CC:DD:EE:FF' will be squeezelite's MAC address
; method = pulse
; source = auto

; method = alsa
; source = hw:Loopback,1

; method = fifo
; source = /tmp/mpd.fifo
; sample_rate = 44100
; sample_bits = 16

; method = shmem
; source = /squeezelite-AA:BB:CC:DD:EE:FF

; method = portaudio
; source = auto

[output]

# Output method. Can be 'ncurses', 'noncurses', 'raw', 'noritake' or 'sdl'.
# 'noncurses' uses a custom framebuffer technique and prints only changes
# from frame to frame in the terminal. 'ncurses' is default if supported.
#
# 'raw' is an 8 or 16 bit (configurable via the 'bit_format' option) data
# stream of the bar heights that can be used to send to other applications.
# 'raw' defaults to 200 bars, which can be adjusted in the 'bars' option above.
#
# 'noritake' outputs a bitmap in the format expected by a Noritake VFD display
#  in graphic mode. It only support the 3000 series graphical VFDs for now.
#
# 'sdl' uses the Simple DirectMedia Layer to render in a graphical context.
; method = ncurses

# Visual channels. Can be 'stereo' or 'mono'.
# 'stereo' mirrors both channels with low frequencies in center.
# 'mono' outputs left to right lowest to highest frequencies.
# 'mono_option' set mono to either take input from 'left', 'right' or 'average'.
# set 'reverse' to 1 to display frequencies the other way around.
; channels = stereo
; mono_option = average
; reverse = 0

# Raw output target. A fifo will be created if target does not exist.
; raw_target = /dev/stdout

# Raw data format. Can be 'binary' or 'ascii'.
; data_format = binary

# Binary bit format, can be '8bit' (0-255) or '16bit' (0-65530).
; bit_format = 16bit

# Ascii max value. In 'ascii' mode range will run from 0 to value specified here
; ascii_max_range = 1000

# Ascii delimiters. In ascii format each bar and frame is separated by a delimiters.
# Use decimal value in ascii table (i.e. 59 = ';' and 10 = '\n' (line feed)).
; bar_delimiter = 59
; frame_delimiter = 10

# sdl window size and position. -1,-1 is centered.
; sdl_width = 1000
; sdl_height = 500
; sdl_x = -1
; sdl_y= -1

[color]

# Colors can be one of seven predefined: black, blue, cyan, green, magenta, red, white, yellow.
# Or defined by hex code '#xxxxxx' (hex code must be within ''). User defined colors requires
# ncurses output method and a terminal that can change color definitions such as Gnome-terminal or rxvt.
# if supported, ncurses mode will be forced on if user defined colors are used.
# default is to keep current terminal color
; background = default
; foreground = default

# SDL only support hex code colors, these are the default:
; background = '#111111'
; foreground = '#33cccc'


# Gradient mode, only hex defined colors (and thereby ncurses mode) are supported,
# background must also be defined in hex  or remain commented out. 1 = on, 0 = off.
# You can define as many as 8 different colors. They range from bottom to top of screen
; gradient = 0
; gradient_count = 8
; gradient_color_1 = '#59cc33'
; gradient_color_2 = '#80cc33'
; gradient_color_3 = '#a6cc33'
; gradient_color_4 = '#cccc33'
; gradient_color_5 = '#cca633'
; gradient_color_6 = '#cc8033'
; gradient_color_7 = '#cc5933'
; gradient_color_8 = '#cc3333'


[smoothing]

# Percentage value for integral smoothing. Takes values from 0 - 100.
# Higher values means smoother, but less precise. 0 to disable.
# DEPRECATED as of 0.8.0, use noise_reduction instead
; integral = 77

# Disables or enables the so-called "Monstercat smoothing" with or without "waves". Set to 0 to disable.
; monstercat = 0
; waves = 0

# Set gravity percentage for "drop off". Higher values means bars will drop faster.
# Accepts only non-negative values. 50 means half gravity, 200 means double. Set to 0 to disable "drop off".
# DEPRECATED as of 0.8.0, use noise_reduction instead
; gravity = 100


# In bar height, bars that would have been lower that this will not be drawn.
# DEPRECATED as of 0.8.0
; ignore = 0

# Noise reduction, float 0 - 1. default 0.77
# the raw visualization is very noisy, this factor adjusts the integral and gravity filters to keep the signal smooth
# 1 will be very slow and smooth, 0 will be fast but noisy.
; noise_reduction = 0.77

[eq]

# This one is tricky. You can have as much keys as you want.
# Remember to uncomment more then one key! More keys = more precision.
# Look at readme.md on github for further explanations and examples.
# DEPRECATED as of 0.8.0 can be brought back by popular request, open issue at:
# https://github.com/karlstav/cava
; 1 = 1 # bass
; 2 = 1
; 3 = 1 # midtone
; 4 = 1
; 5 = 1 # treble
在~/.config/cava/config-waybar中写入以下配置
[general]

framerate = 60
bars = 20
autosens = 1
sensitivity = 100

[input]

method = pulse
source = auto

[output]

method = raw
raw_target = /dev/stdout
data_format = ascii
ascii_max_range = 7
bar_delimiter = 59
frame_delimiter = 10

[smoothing]

noise_reduction = 0.77
接下来在Waybar中配置cava,首先创建一个脚本文件~/.config/waybar/scripts/cava.sh,并写入以下内容
#!/bin/bash

is_cava_ServerExist=$(ps -ef | grep -m 1 cava | grep -v "grep" | wc -l)
if [ "$is_cava_ServerExist" = "0" ]; then
  echo "cava_server not found" >/dev/null 2>&1
#	exit;
elif [ "$is_cava_ServerExist" = "1" ]; then
  killall cava
fi

exec cava -p ~/.config/cava/config-waybar | sed -u 's/;//g;s/0/▁/g;s/1/▂/g;s/2/▃/g;s/3/▄/g;s/4/▅/g;s/5/▆/g;s/6/▇/g;s/7/█/g;'
然后在Waybar中添加cava模块配置,例如我的配置如下
  "custom/cava-internal": {
    "exec": "sh ~/.config/waybar/scripts/cava.sh",
    "format": "{}",
    "tooltip": false,
    "on-click": "kitty -e cava ~/.config/cava/config",
    "layer": "below",
    "output": "all"
  },
可以根据自己的情况配置一下style样式,然后重新启动Waybar就可以看到cava模块正常显示啦
yazi
yazi是一个用Rust编写的终端文件管理器,建议参考文档
首先执行下面命令安装yazi和一些必要的包
sudo pacman -S yazi ffmpeg 7zip jq poppler fd ripgrep fzf zoxide imagemagick

paru -S resvg
然后可以在~/.config/fish/functions/目录下新建一个y.fish文件,写入以下内容
function y
	set tmp (mktemp -t "yazi-cwd.XXXXXX")
	yazi $argv --cwd-file="$tmp"
	if set cwd (command cat -- "$tmp"); and [ -n "$cwd" ]; and [ "$cwd" != "$PWD" ]
		builtin cd -- "$cwd"
	end
	rm -f -- "$tmp"
end
这样就可以在Fish Shell中指定一个别名y来对yazi进行封装一下,并且实现在按q退出的时候自动切换到yazi最后所在的目录(要是不想切换的话可以按Q)
接下来可以根据需要在~/.config/yazi/目录下创建yazi.toml、keymap.toml和theme.toml这三个文件来自定义配置,具体内容可以参考文档
关于yazi默认的keymap可以在这里查看
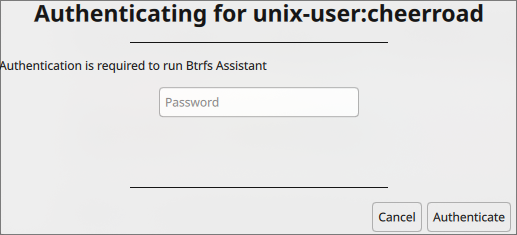
hyprpolkitagent
hyprpolkitagent是一个为Hyprland设计的轻量Polkit认证代理工具,用于在Wayland环境下处理GUI应用程序的权限提升请求,执行下面命令安装
sudo pacman -S hyprpolkitagent
需要提权的时候会显示类似下面这种截图
然后在~/.config/hypr/hyprland.conf文件中添加以下内容用于自启动
exec-once = systemctl --user start hyprpolkitagent
wl-clipboard + cliphist
执行下面命令安装wl-clipboard和cliphist这两个工具用于剪贴板管理
sudo pacman -S wl-clipboard cliphist
接下来在~/.confg/hypr/hyprland.conf文件中添加下面三行内容
exec-once = cliphist wipe; wl-paste --type text --watch cliphist store

exec-once = cliphist wipe; wl-paste --type image --watch cliphist store

bind = $mainMod, X, exec, cliphist list | rofi -dmenu | cliphist decode | wl-copy
然后通过快捷键Win + X可以调出剪贴板内容
slurp + grim + satty/swappy
使用slurp、grim和satty/swappy这几个工具可以用于实现屏幕截图功能
sudo pacman -S slurp grim satty swappy
satty相对swappy来说功能丰富一些,也方便操作,但是目前使用的时候发现偶尔截图后窗口无法显示全部工具栏,还不能调整,没找到方案解决,所以暂时先用的swappy
- satty
如果使用satty的话,需要在~/.confg/hypr/hyprland.conf文件中添加这行内容
bind = $mainMod SHIFT, S, exec, grim -g "$(slurp)" -t ppm - | satty --filename - --fullscreen --copy-command wl-copy --output-filename "/tmp/screenshot-%Y-%m-%d_%H:%M:%S.png"
然后就可以使用Win + SHIFT + S快捷键进行截图(注意快捷键不要冲突)
- swappy
如果使用swappy的话,则需要在~/.confg/hypr/hyprland.conf文件中添加这行内容
bind = $mainMod SHIFT, S, exec, grim -g "$(slurp)" - | swappy -f -
然后同样使用Win + SHIFT + S快捷键进行截图(注意快捷键不要冲突)
Grub美化
GNOME-LOOK网站提供了许多Grub美化方案,进入网站后找到Categories - Grub Themes即可查看
本次配置使用了这个项目:grub2-themes (需安装imagemagic)
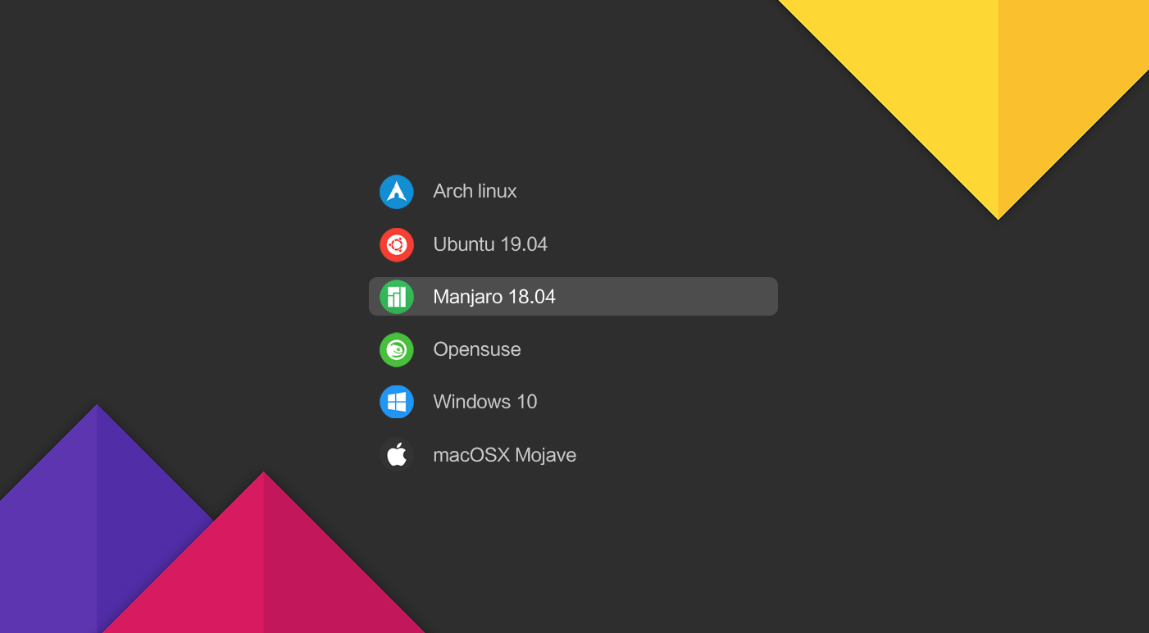
Sddm美化
借鉴Github项目PROxZIMA/boo-sddm
首先执行下面命令安装
paru -S boo-sddm-git
进入该主题的目录/usr/share/sddm/themes/boo,然后编辑theme.conf文件,将Background设置为自己的想用的背景图片,再更改主题中一下配色
如果想更改登录头像,可以到faces子目录下替换一下.face.icon文件
然后编辑/usr/lib/sddm/sddm.conf.d/default.conf文件,将[Theme]下的Current变量设置为主题的名字boo
再次登录就可以显示新主题啦
其他应用
之前在写安装KDE环境的文章中介绍过很多应用,这部分就简单介绍一下我自己在Hyprland中安装的一些觉得比较有用或有意思的应用,部分会跟之前的文章有重合,此部分非必需,仅供参考
Chrome浏览器
执行下面命令安装
paru -S google-chrome
安装完Chrome浏览器后,如果发现字体很模糊,可以打开chrome://flags/#ozone-platform-hint,然后设置为auto,重启即可
Neofetch
Neofetch是一个可以非常美观地显示系统信息的命令行工具
sudo pacman -S neofetch
fd
fd是一个旨在替代find的快速命令行文件搜索工具,使用方法就不在这里介绍了
sudo pacman -S fd
btop
btop是一个现代化的终端系统监控工具,可以实时显示系统资源使用情况,安装方法如下
sudo pacman -S btop
btop配置文件位于~/.config/btop/目录,可进行配置和样式美化
tldr
tldr是一个命令行帮助工具,提供常用命令的简短示例,可以替代复杂的man页面
首先进行安装
sudo pacman -S tldr
使用的话直接执行tldr <cmd>即可
bat
bat是一个用于替代cat命令的现代化工具,用于查看文件内容,但增加了语法高亮等高级功能,安装如下
sudo pacman -S bat
bat配置文件位于~/.config/bat/目录,可进行配置和样式美化
navi
navi是一个交互式的命令行备忘工具,旨在帮助用户快速查找和执行命令行命令
sudo pacman -S navi
ripgrep
ripgrep是一个快速、跨平台的文本搜索工具
sudo pacman -S ripgrep
fzf
fzf是一个交互式命令行模糊查找工具,适用于快速查找文件、命令历史或任意文本列表
sudo pacman -S fzf
lsd
lsd是一个由rust语言写的现代化的ls命令替代工具(也可以用另一款类似的工具eza),用于在Linux系统中以更美观的方式列出目录内容,带有彩色输出、图标支持等特性,可以执行下面命令安装
sudo pacman -S lsd
安装后可以在Fish的配置文件中设置alias
mpv
mpv是一个开源、跨平台的媒体播放器,具有轻量、高性能、广泛格式支持和高度可定制性的特点
执行下面命令安装
sudo pacman -S mpv
Syncthing
参考我这篇文章的内容
Obsidian
这里先安装两个我惯用的字体,CascadiaCode可以直接用包管理安装
sudo pacman -S ttf-cascadia-code
LxgwWenKai可以先到GitHub下载字体的压缩包,然后解压后将字体目录移动到/usr/local/share/fonts/(可能需要先手动创建)目录下
安装示例:

wget https://github.com/lxgw/LxgwWenKai/releases/download/v1.511/lxgw-wenkai-v1.511.zip

unzip lxgw-wenkai-v1.511.zip

sudo mkdir /usr/local/share/fonts  # 如果不存在则手动创建

sudo mv lxgw-wenkai-v1.511 /usr/local/share/fonts/
最后安装Obsidian
sudo pacman -S obsidian
LibreOffice
安装一个开源的办公套件,不用多说
可以选择安装稳定的简体中文版
pacman -S libreoffice-still libreoffice-still-zh-cn
或者安装最新feature的简体中文版本
pacman -S libreoffice-fresh libreoffice-fresh-zh-cn
Wechat + QQ
平时有些工作还是离不开微信和QQ的
我安装的是下面这两个AUR包,在Hyprland下都是可以正常使用的
paru -S wechat-appimage

paru -S linuxqq
Zotero
一款好用的文献管理工具
paru -S zotero-bin
Termius
非常好用的SSH客户端,可以执行下面命令安装
paru -S termius
有趣的CLI工具
可以考虑安装一些有趣的终端小工具,参考我的这篇文章
至此,基本上就是全部的配置内容啦,如有新的内容会在后面随时补充!
写在最后
因为也是第一次用Hyprland,甚至也是第一次用WM,所以这次的配置以及本文的撰写花费非常多的时间,以至于影响到了正常的科研工作,加上这本身也是兴趣爱好,算不上"正事",后面先忙点"正事",可能暂时先不写太长的文章
But
生命不息,“挥霍"不止